When installing tile in moisture-prone areas, choosing the right foundation is just as important as selecting the tile itself. A Waterproof Tile Backer Board provides a stable, moisture-resistant base that helps improve the durability and performance of tile installations. Whether you’re renovating a bathroom, building a shower enclosure, or upgrading a laundry room, understanding how these boards work can help you make a well-informed decision.
This guide explains what a waterproof tile backer board is, its benefits, common applications, installation basics, and what to look for when selecting the right product.
What Is a Waterproof Tile Backer Board?
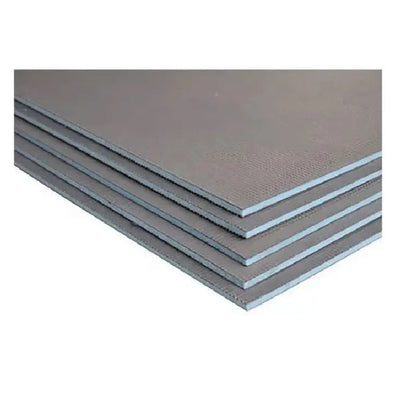
A Waterproof Tile Backer Board is a rigid panel designed to support tile installations in areas exposed to moisture. Unlike traditional drywall or wood-based panels, it is engineered to resist water penetration and maintain structural stability over time.
Many modern backer boards feature an XPS (extruded polystyrene) foam core with a cement-coated surface. This combination creates a lightweight yet durable panel that offers excellent tile adhesion while helping to protect against mold and mildew.
Because it is specifically designed for wet environments, it is commonly used in showers, bathrooms, kitchens, and other spaces where moisture is a concern.
Key Benefits of Waterproof Tile Backer Board
Choosing the right backer board offers several long-term advantages for homeowners and professional installers alike.
1. Excellent Moisture Protection
One of the biggest advantages is its waterproof core. Unlike materials that absorb water, a waterproof backer board helps prevent moisture from reaching wall studs or subfloors, reducing the risk of structural damage.
2. Mold and Mildew Resistance
Moist environments often create ideal conditions for mold growth. Waterproof backer boards with moisture-resistant materials help reduce this risk, contributing to healthier indoor spaces.
3. Lightweight and Easy to Handle
Compared to traditional cement boards, XPS-based boards are significantly lighter. This makes transportation, cutting, and installation easier while reducing installer fatigue.
4. Strong Tile Support
The cement-coated surface provides an excellent bonding surface for tile adhesives. This helps tiles remain securely attached over years of daily use.
5. Faster Installation
Because the material is lightweight and easier to cut, installation generally requires less effort than heavier alternatives, making it suitable for both contractors and DIY renovators.
Where Can Waterproof Tile Backer Board Be Used?
A quality waterproof backer board is suitable for a variety of residential and commercial applications.
Common installation areas include:
- Shower walls
- Bathroom floors
- Tub surrounds
- Kitchen backsplashes
- Laundry rooms
- Powder rooms
- Entryways exposed to moisture
- Spa and wellness areas
- Commercial washrooms
Its versatility makes it an excellent choice wherever tile is installed in damp or wet conditions.
Why XPS Foam Core Makes a Difference
Many modern backer boards use an extruded polystyrene (XPS) foam core, which offers several practical advantages.
These include:
- 100% waterproof core
- Excellent dimensional stability
- Lightweight construction
- Easy cutting with standard utility knives
- Improved handling during installation
- Long-lasting performance in wet environments
Combined with a cement-coated surface, XPS boards create a dependable foundation for ceramic, porcelain, and natural stone tile installations.
Basic Installation Overview
Although installation procedures may vary depending on the project, most waterproof tile backer boards follow a similar process.
Step 1: Prepare the Surface
Ensure the wall studs or subfloor are clean, level, and structurally sound before installation.
Step 2: Measure and Cut
Measure carefully and cut the board to fit using a utility knife or other recommended cutting tools.
Step 3: Secure the Board
Fasten the panels using backer board screws and washers according to the manufacturer’s recommendations.
Step 4: Seal the Joints
Apply joint tape over seams and use a waterproof silicone or waterproofing sealant where recommended. Proper sealing helps maintain the integrity of the installation.
Step 5: Install Tile
Once the backer board is securely installed and prepared, tile adhesive can be applied before laying the tiles.
Always follow the manufacturer’s installation instructions for the best results.
Features to Look for When Choosing a Waterproof Tile Backer Board
Not all backer boards offer the same level of performance. Before purchasing, consider the following features:
Waterproof Core
A true waterproof core helps protect against long-term water exposure rather than simply resisting moisture.
Cement-Coated Surface
This improves tile adhesion and creates a durable installation surface.
Mold and Mildew Resistance
Look for materials specifically designed to help resist mold growth in wet environments.
Ease of Installation
Lightweight boards simplify transportation, cutting, and installation, making projects more efficient.
Suitable Thickness
Choose the appropriate board thickness based on your wall or floor application and tile requirements.
Waterproof Tile Backer Board vs. Traditional Cement Board
While both products provide support for tile, there are notable differences.
| Waterproof Tile Backer Board | Traditonal Cement Board |
|---|---|
| Lightweight | Heavier to carry |
| Waterproof core | May require additional waterproofing |
| Easier to cut | Creates more dust during cutting |
| Faster installation | More labor-intensive |
| Mold-resistant materials | Moisture resistance varies |
Both products can perform well when installed correctly, but many installers appreciate the convenience and moisture protection offered by modern XPS waterproof boards.
Maintenance Tips
Although the backer board remains hidden behind the finished tile, maintaining the overall tiled surface helps maximize its lifespan.
Helpful maintenance practices include:
- Inspect grout regularly for cracks.
- Replace damaged sealant promptly.
- Repair leaking plumbing fixtures quickly.
- Keep shower areas properly ventilated.
- Clean tile surfaces using appropriate cleaning products.
Preventive maintenance helps preserve both the tile installation and the underlying structure.
Final Thoughts
A Waterproof Tile Backer Board provides an essential foundation for durable, long-lasting tile installations in moisture-prone spaces. Its waterproof core, mold resistance, lightweight construction, and reliable tile support make it a practical choice for bathrooms, showers, floors, and other wet areas.
Whether you’re a homeowner planning a renovation or a contractor working on a professional installation, selecting a quality backer board can improve both the performance and longevity of your project. Understanding the available features and following proper installation practices helps ensure your tiled surfaces remain attractive and dependable for years to come.
Frequently Asked Questions (FAQs)
1. What is a Waterproof Tile Backer Board used for?
It is used as a stable, moisture-resistant base for tile installations in bathrooms, showers, kitchens, laundry rooms, and other wet areas.
2. Is an XPS waterproof tile backer board completely waterproof?
Yes. Products with a 100% waterproof XPS foam core are designed to resist water penetration, making them suitable for wet environments.
3. Can I install a Waterproof Tile Backer Board on floors?
Yes. Many waterproof tile backer boards are suitable for both floors and walls when installed according to the manufacturer’s guidelines.
4. Is a waterproof backer board better than drywall behind tile?
For wet areas, waterproof backer boards provide superior moisture protection and durability compared to standard drywall.
5. What fasteners are typically required?
Most installations require backer board screws, washers, joint tape, and a waterproof silicone or waterproofing sealant for seams.